
A few years later I learned how to bake bread using a sourdough starter. That is a lot more complicated, though amazingly delicious if you have the time and energy. Definitely worth exploring after the basics of bread-baking are mastered.
If you have never baked bread ever then you are in for a treat. You will feel amazingly accomplished after baking your very own bread from scratch without corn syrup, xanthum gum, or genetically modified ingredients of any kind.
The following method is done completely by hand without the aid of any appliances. I have added notes for alternative use of appliances. Use whatever you enjoy, have time for, want to use. Who cares how the bread got made?
Whole Wheat Bread
Makes 2 loaves
|
|
|


2 cups plus 2 Tbsp warm water
3-4 tsp dry yeast
2 Tbsp raw honey or organic sugar
Stir and allow to sit to activate the yeast and get it started.

| 
|
3 cups of unbleached flour (organic, of course)
2 cups of whole wheat flour (organic, of course)
2 tsp salt
Whisk dry ingredients together. Nope, I don't sift.
Flour measuring is kind of tricky. Make sure you fluff up or sift your flour before measuring. I fluff because I am lazy. I don't want to wash my sifter. Okay, that isn't true that I am lazy or I wouldn't be making bread from scratch. It hurts my hands terribly to use a sifter. It sounds cuter when I just say that I am too lazy to wash my sifter. But I digress.
Taking the 1 cup measuring cup, I put it into the flour and scoop and release over and over, fluffing the flour. If the cup has a little more than 1 cup or a little less than 1 cup when you add it to the bowl that is okay. It really doesn't matter much.
 | |
| Proofed yeast mixture |
Putting it all togetherPour water/yeast/sugar mixture into dry ingredients. Add 2 Tbsp fat of your choice (olive oil, coconut oil, I have even used lard). Stir with a good-quality wooden spoon. I prefer my shorter bamboo spoon. If the mixture is too dry to stir easily add 1 Tbsp water at a time until it is very sticky. At this stage of bread making your goal is to develop the gluten which creates the structure necessary to hold the carbon dioxide gas the yeast organisms will create causing your dough to rise. Gluten develops as it is rubbed, moved, handled. You do not need a heavy hand during this process. As a matter of fact, there are bread makers (human kind) who don't knead at all, they just stir, allow to rise several times, gently stretching between risings. I have done it both ways and prefer my method because it takes less of my time and attention. If I am tired, I actually sit down in front of the tv or computer with the bowl and stir for a few minutes off and on. I stir about 10 times let it sit, stir 10 more times, take a break -- I have weakness in my arms so I take my time. You just want to develop the gluten a bit. If you are able-bodied you can get this stage done in 2-3 minutes of stirring in the kitchen, or use your mixer with a dough hook. If you have a bread maker you can use it for this entire stage and even the rising stage, then remove to form the loaves or rolls. I don't like the big hole the bread maker leaves in a loaf of bread so when my bread maker worked I just used it to mix, knead and rise. I also noticed that the loaves were much tougher than my handmade bread. |


|
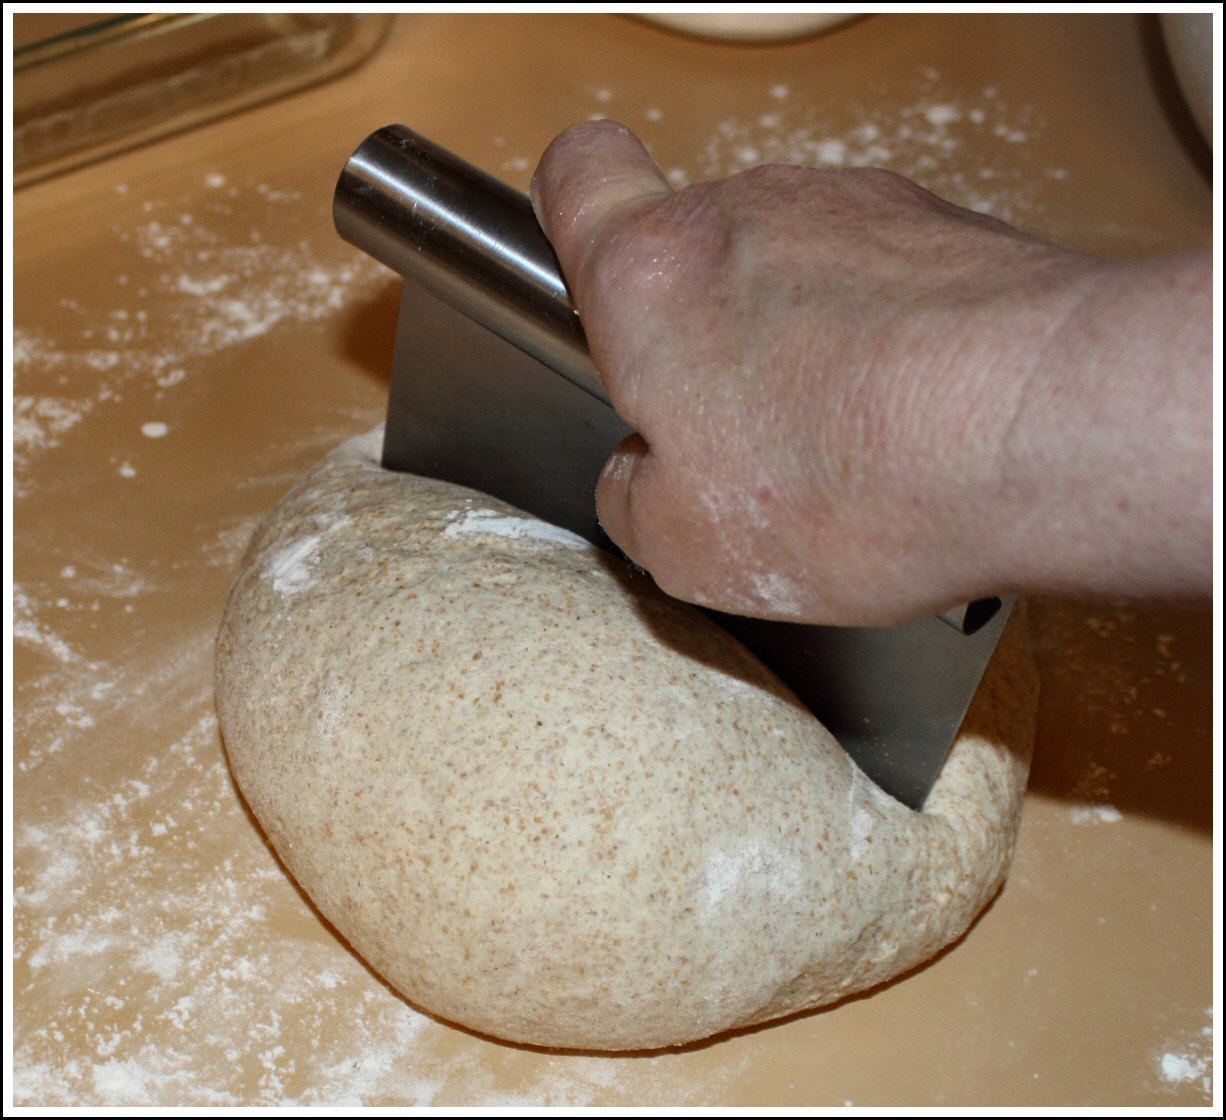
Kneading and Forming the DoughAfter the dough is very stretchy and you can tell the gluten has developed enough (it is very, very difficult to stir), dump the dough onto a floured surface, either a countertop or large wooden cutting board. Add more flour until you can handle it with floured hands and not have the dough stick to your hands (it will still be a little bit sticky but not too bad). Knead the dough for a couple of minutes continuing to add flour. The goal is to end up with approximately 3 cups of whole wheat flour total but you are looking more for a consistency, not an amount of flour. Pour a Tbsp of oil in the bowl, put the dough ball back in the bowl, flip it so the top and bottom of dough ball are oiled. Cover with waxed paper or plastic wrap and a kitchen towel. The plastic wrap keeps the bread moist and the towel helps retain warmth which is necessary for the rising process. I place my dough in a warm place in my kitchen to rise. Keep out of cool drafts. Near a coffee pot, in the corner on a counter on the stove side, even beside the refrigerator are good places. I like to make bread when I have a pot of something cooking on the stove. A warm kitchen makes the rising process go faster.Allow the covered dough to rise for an hour or so until the dough is at least doubled in size. I have read that it should bounce back when you press down with your finger. Really, it isn't that complicated. A little less rising, a little more rising. It doesn't really matter that much for family bread baking. We are not going gourmet here, at least I'm not. Your family, partner, spouse will absolutely love you for that amazing smell you are filling the house with and that fresh-baked bread taste, hot from the oven experience. If you want you can start your bread at night and put the bowl in the fridge to slow rise overnight. Remove from fridge and allow to come to room temperature before continuing.Putting the waxed paper or plastic wrap aside to reuse later, flour your hands and punch down the dough. This gets the majority of the air bubbles out of the dough. Knead for a minute or two on a floured board. You are getting ther est of the air bubbles out and developing the gluten a little more for the final rising. You should not need to add any more flour at this stage. The dough will be fairly smooth though not as smooth as white bread dough. Divide the dough in half. Forming the LoavesThere are many methods for forming loaves for baking. I lean towards what is fastest and easiest. For long loaves, I keep folding the long sides into itself as the loaf gets longer then fold the ends in a couple of inches. You want your dough to be the length of the baking dish or pan. Forming a loaf pan shape you can tri-fold or roll it out and then roll it up similar to a jelly roll shape. Place both loaves in a greased 9x13 glass baking dish or individual loaf pans. My new favorites are two long loaves in the 9x13 pan. Bakes so fast, versatile size for sandwiches or garlic bread, and looks so lovely, artisan-like. Brush the top of the dough with olive oil or butter, or spray using a non-GMO baking spray which means no canola. I found an organic olive oil baking spray at my grocery store or you can buy spritzer bottles designed for oils.Cover with the waxed paper or plastic wrap you used in the first rising then with a kitchen towel and allow to rise a second time. I preheat the oven to 400 degrees about 30 minutes after the start of the second rising. The heat from the oven helps the dough to rise quicker. Bake at 400 degrees F for 30-35 minutes. Remove from pan immediately and allow to cool on it's side if it was baked in a loaf pan or on its bottom if baked in the 9x13 (I pull the two loaves apart to cool) for 10-15 minutes before slicing if you want warm bread. Cool completely if you want sliced bread for later. Brush the loaves with melted butter or olive oil for a softer crust, or leave as is for a harder crust. I like the long loaves which make smaller sandwiches. These two loaves don't last 24 hours in my household. If you are not going to use the bread immediately you can double wrap/bag and freeze. You can also slice and then freeze if you like, even freeze a few slices in sandwich bags for making school lunches (reuse the storage bags for the sandwiches). The frozen bread defrosts as it helps keep the sandwich refrigerated until lunch. Well, you did it! This recipe can be used for rolls, fried bread, even flatbread (without the second rising). This is just the beginning. The world of bread baking is enormous and full of adventure. And don't forget sourdough. Enjoy! |
  
             |
No comments:
Post a Comment